Peshka – a great tool for improving your chess skills


Improvement Guide Articles
Here are some articles by GM Alexandra Kosteniuk and chess guru Steve Lopez on how best to improve at chess from different levels. You can come back to this main page anytime.


Peshka is an outstanding free computer program which will open up to you a whole world of chess learning and fun. Peshka is an easy to use interface which provides access to a host of chess training courses available from Convekta Ltd. But Peshka isn’t just a “reader” program. The tools in Peshka give you a great deal of flexibility in how you use the training courses and the program will act as your personal chess tutor: it teaches you, tests you, and it even tracks your progress.
The first steps to unlocking the instructional potential of Peshka are downloading and installing Peshka. You can download the program using the following link:
http://chessok.com/download/Training/PeshkaSetup.exe
After you’ve downloaded this installation file to your computer, open the folder into which you saved the file PeshkaSetup.exe and double-click on that file to run it. Simply follow the prompts to easily install the Peshka software on your computer.
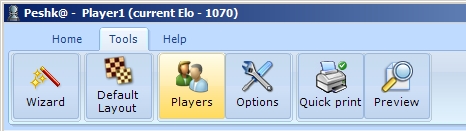
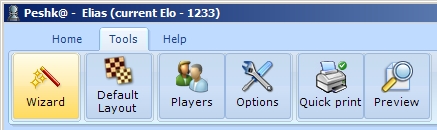
After you’ve installed the program, you’ll need to create a new player profile for yourself. If the Peshka software doesn’t automatically prompt you to do this, you can select the Tools menu and click the Players button:
This will display a dialogue showing the existing players. Click the “Create New Player” link to display this dialogue:
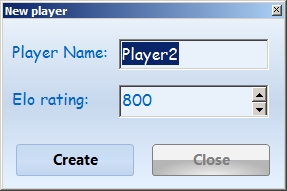
Simply type your name in the “Player Name” box and, if you have an established chess rating, type it in the box to the right of “Elo rating” (if you don’t have a rating, you may use the default of 800 or change it to a zero if you wish). Then click “Create” and you’ll see your name added to the player list.
If more than one player is using Peshka to improve their chess skills on the same computer, be sure to click the Players button each time you start Peshka to make sure your proper profile is loaded. Just click on your name to highlight it and then click the “Switch” button:

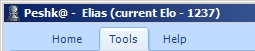
The name of the current player is displayed on the blue menu bar at the top of the display:
Now that we know how to create a player profile, we’ll next learn about the Wizard screen. This is the screen where we can perform several functions related to chess courses: preview demos of chess courses available for Peshka, activate the courses we’ve purchased, and switch between courses.
To visit the Wizard view, select Tools and then click the Wizard button:
When you first visit the Wizard panel, it will alert you that you’re not logged in:
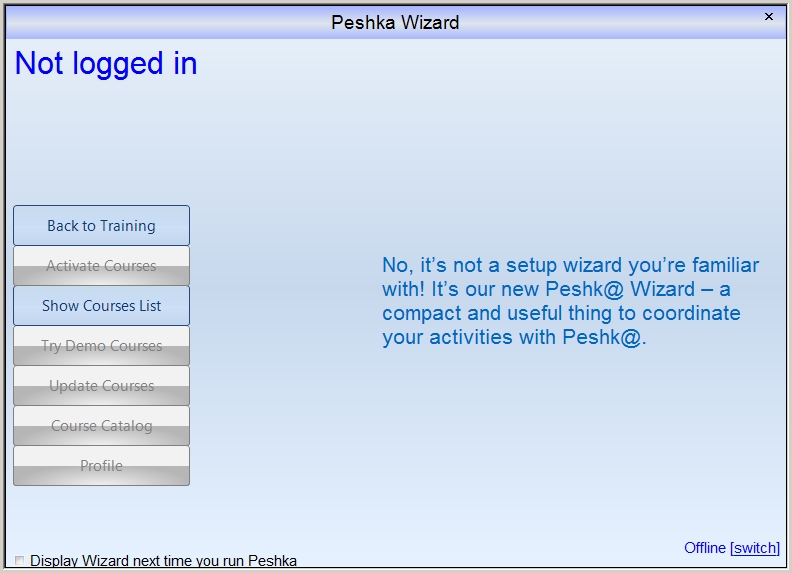
To use the Wizard view, you’ll first need to connect to the Internet, then click the “Switch” link in the lower right corner of the screen. If you’ve never before registered as a Peshka user online, you’ll need to fill in the boxes in the login screen to register, after which you’ll click the “Register” button:

The “Login” will be your user name. You’ll create and verify a password of your choosing. The e-mail address you enter will be used to send verification information to you, as well as to send you activation codes for the courses you’ve purchased.
After you’ve completed the verification process, all of the buttons in the Wizard will be available for you to use:
Clicking “Course Catalog” lets you browse the list of available courses; information about the course content, the recommended Elo rating range for the course, and the course’s price can be found here as well. You can sample content for some of these courses by downloading demo versions; these are listed when you click “Try Demo Courses”.
After you’ve purchased a chess course, you’ll receive an activation code via e-mail. To activate your new course, click “Activate Courses”.
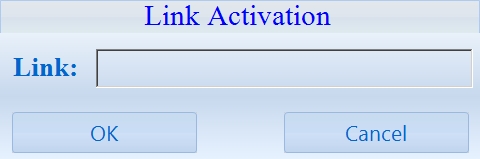
You’ll just type the activation code into the box (or simply cut and paste it from the e-mail into the “Link” field by using CTRL-C and CTRL-V) and then click “OK”. You’ll see the name of your new course by clicking “Show Courses List”. Click on the name of the course and then click click “OK” to download it. Be patient; it will take a little time for the course to download and be available in your Peshka program; you’ll see an hourglass beside the name of the course, indicating that the course is still downloading. A blue arrow beside a course’s name means that it’s been purchased but has not yet been downloaded.
After a course has finished downloading, you’ll be able to use it to expand your chess knowledge. What follows is a brief introduction to how to use the main features of the Peshka interface program to improve your chess abilities using the variety of available chess courses. This guide isn’t intended to be a complete guide to all of Peshka’s many features and uses, but a full Peshka manual is available for free download. You can download an English copy of the manual in PDF format here:
http://chessok.com/doc/manuals/PeshkaEng.pdf
…and in DOC format here:
http://chessok.com/doc/manuals/PeshkaEng.doc
The manual is also available in German and Turkish (each in PDF and DOC formats) from this page:
http://chessok.com/shop/download/training_course.html
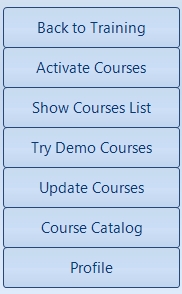
You can easily switch between the courses you’ve purchased by first clicking the Wizard button, then by clicking “Show Courses List”, clicking on the name of a course, and then clicking “OK”. To go back to the main instructional screen in Peshka, click “Back to Training” in the Wizard sceen:

When you click “Back to Training”, you’ll see the main screen of the Peshka program:
There are three main panels in this view: the chessboard (on the left of the screen), the table of contents for the course (the uppermost of the two panels on the right, labelled “Navigator”), and the text (the lowermost of the two righthand panels, labelled “Notation”).
The Peshka program provides two main modes of operation, corresponding to the first two parts of the learning cycle we’ve previously mentioned. The “Theory” mode corresponds to the study part of the learning cycle, while the “Practice” mode obviously corresponds to the practice stage of the learning cycle. (There is another Peshka feature which corresponds to analysis, and we’ll consider that feature later on.) You can easily switch between “Theory” and “Practice” modes by using the buttons located at the bottom of the Navigator pane:
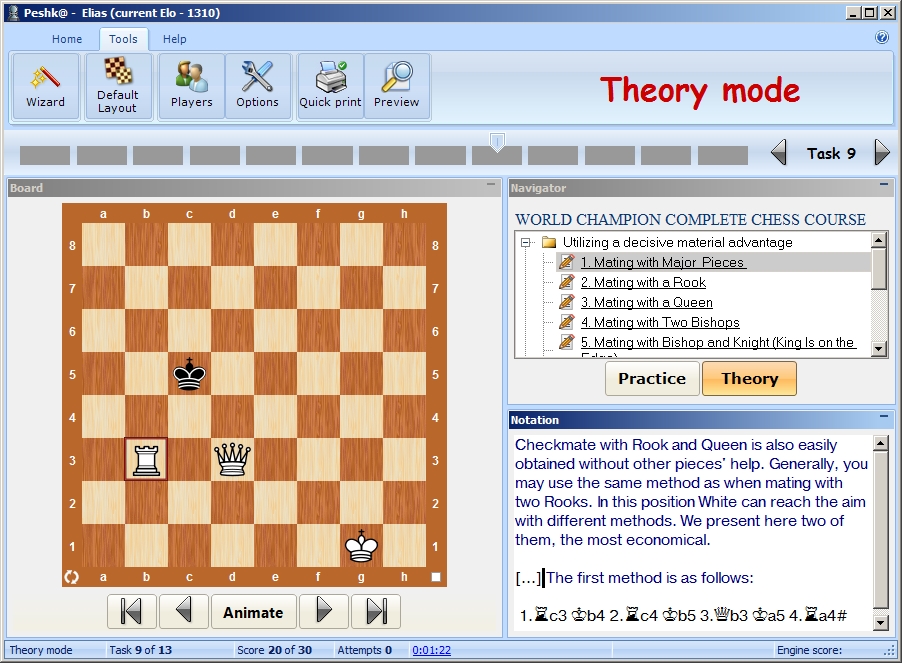
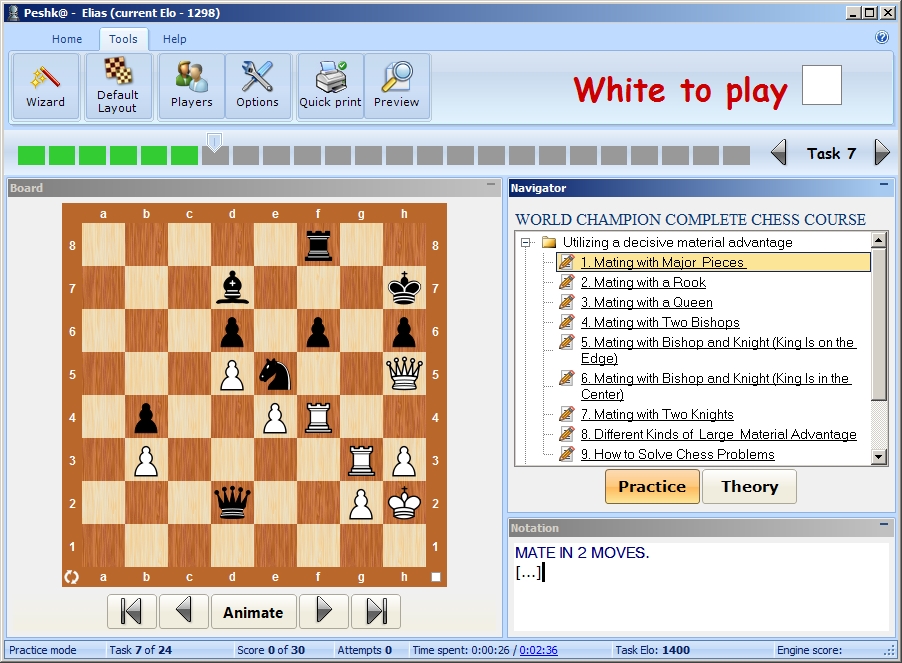
“Theory” mode displays the instructional text in the Notation panel. After selecting a chapter (or lesson) in the Navigator panel, you’ll see the text appear in the Notation panel. You can page through the parts of a lesson (called “Tasks”) by clicking the boxes which run across the screen between the menu bar and the chessboard and Navigator panels. Here we see what the whole screen looks like after clicking the ninth task of the “Mating with Major Pieces” lesson:

In addition to selecting a task by clicking on the boxes, you can also page through the tasks by using the arrow keys to the far right of the row of boxes (on either side of the words “Task 9” in the above illustration).
The illustration shows a typical short chess lesson. You read the instructional text, then replay the moves presented in the Notation. You can then step forward to the next lesson by clicking the next Task box directly from the row or by clicking the righthand arrow next to the “Task” number.
When the Notation box displays chess notation (as it does in the above illustration), you can play through these moves on the chessboard by clicking the arrow buttons below the board. You can use the arrow buttons to play through the moves one at a time, or jump quickly to the start or end of the notation using the buttons showing an “arrow and line”. The “Animate” button replays the move sequence automatically. The position on the chessboard changes as you step through the moves in the Notation:

A flashing black vertical cursor marks your current place in the notation (which is very useful for when complete games are displayed in the Notation pane).
You can also step forward and backward through the moves by using your keyboard’s cursor keys or by clicking directly on a move in the Notation panel.
Some of the lessons will give you chess problems to complete; the way you’ll do the problems is discussed a bit farther down when we talk about “Practice” mode. The method for moving the pieces is the same whether in Theory mode or Practice mode.
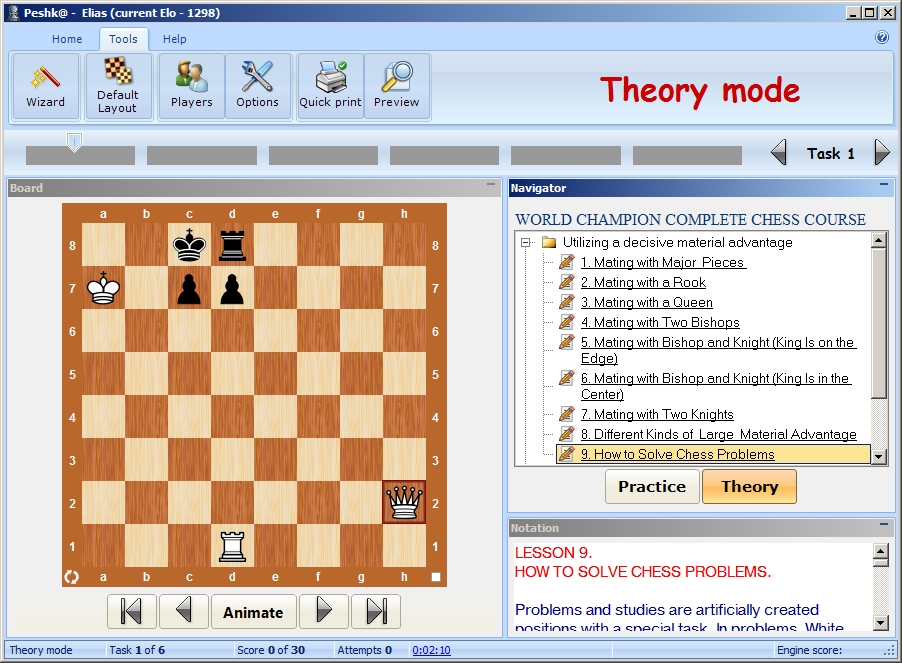
Once you’ve completed all of the lessons and tasks grouped together in the Navigator panel (for example, after you’ve finished all nine of the sections listed under “Utilizing a decisive material advantage”, ending with “How to solve chess problems” in the illustration above), it’s time to practice what you’ve learned. Click the “Practice” button to switch to that mode (and you’ll see that the mode has been successfully changed in the large panel on the far right of the menu bar when the text changes to provide the side to move in the current position):
The Peshka program automatically jumps to the first task from the group of lessons you’ve just completed. The Notation panel gives you the nature of the challenge (in this case, White mates in two moves). To solve the challenge, you’ll make a move on the chessboard by picking up a piece with the mouse (by left-clicking on it and holding down the mouse button) and moving the piece to a new square (by moving the piece to the intended square and releasing the mouse button). If you make the right move, Peshka will respond with a move of its own; if the move you make is incorrect, Peshka will disallow the move and provide a visual hint on the chessboard as to what the correct move would be. When you successfully complete the task, Peashka provides you with a score for the task:

You can then use the box to the far right of the score (see the above illustration) to advance to the next task.
Peshka even provides you with some feedback on how well you’ve been doing. Click the Home tab from the menu bar, then click the “Elo rating” button:

Clicking the button will display a graph which shows the changes in your estimated chess rating based on how well you’ve scored in the chess challenges you’ve taken:
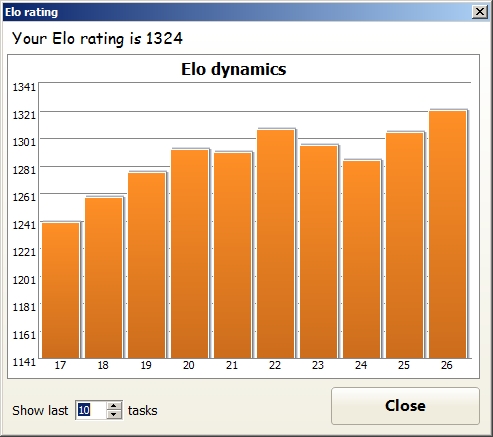
You can change the number of task results displayed in the graph by typing a new value into the box at the lower left of the graph. Clicking “Close” will close the display, of course.
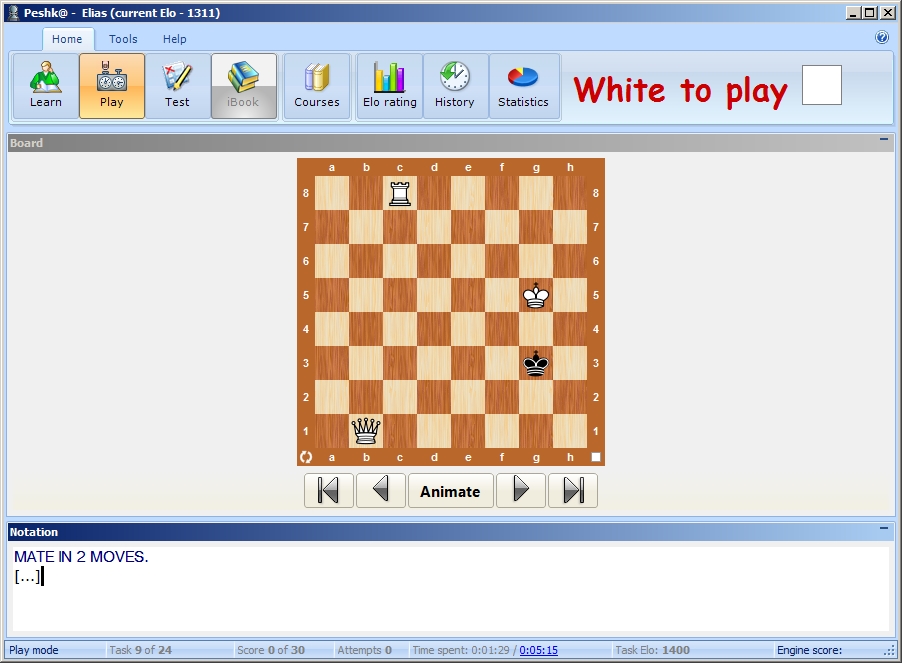
The “Learn” and “Play” buttons on the menu bar simply change the way the main panels are displayed. Clicking “Learn” displays all three of the main panels, while clicking “Play” hides the Navigator panel and places the Notation panel below the chessboard:
We’ve briefly covered the major Peshka features in this short tutorial, but there are a lot of other great options for using this amazing, flexible program! Don’t short-change yourself; use the links we provided earlier to download and read the full Peshka manual to learn more about Peshka’s many exciting features you can use to become a better chessplayer.
Recommendations Peshka Interactive Courses Software
Level 1. Rating from 200 to 600
Chess Tactics for Beginners;Chess: From Beginners to Club;
Chess School for Beginners;
Elementary Checkmates I;
Easy Ways of Taking Pawns and Pieces;
Chess Tactics Level 1;

Level 2. Rating: 600 – 1000
Chess Tactics for Beginners;Elementary Checkmates II;
Simple Defense;
Chess Tactics Level 1;
Chess: From Beginners to Club;
Elementary Chess Combinations


Level 3. Rating: 1000-1200.
Chess Tactics for Beginners;Advanced Defense;
Complete Chess Course;
Chess Tactics Level 2;
Attack on the King I;
Elementary Chess Combinations;
Chess: From Beginners to Club;
Complete Chess Course;
Level 4. Rating: 1200 – 1400
Chess Tactics for Beginners;Chess Combinations Encyclopedia;
Advanced Defense;
CT-ART. Mating Combinations;
Complete Chess Course;
Chess Tactics Level 2;
Attack on the King I;
How to Win Miniatures at Chess;
Elementary Chess Combinations;
CT-ART 4.0;
Chess: From Beginners to Club;
Opening Lab;

Level 5. Rating: 1400 – 1600
Chess Tactics Art for Beginners;Chess Combinations Encyclopedia;
Advanced Defense;
CT-ART. Mating Combinations;
Complete Chess Course;
Chess Tactics Level 3;
Attack on the King II;
How to Win Miniatures at Chess;
Combinations for Club players;
CT-ART 4.0;
Chess: From Beginners to Club;
Complete Chess Course;
Opening Lab;
Encyclopedia of Opening Blunders;


Level 6. Rating: 1600-1800
Chess Tactics for Club Players;Chess Combinations Encyclopedia;
CT-ART. Mating Combinations;
Chess Tactics Level 3;
CT-ART 4.0;
Chess Guide for Club Players;
Total Chess Ending;
Chess Endgame Training;
Theory and Practice of Chess Endings;
Opening Lab;
Encyclopedia of Opening Blunders;
Modern Chess Opening – 7 courses in the series;
Chess Tactics in Opening – 10 courses in the series;


Level 7. Rating: 1800 – 2000
Chess Tactics Level 3;CT-ART 4.0;
Chess Guide for Club Players;
Chess Guide for Intermediate Players;
Chess Strategy;
Middlegame Collections ;
Encyclopedia of Middlegame I,II,III,IV,V;
Total Chess Ending;
Chess Endgame Training;
Theory and Practice of Chess Endings;
Encyclopedia of Opening Blunders;
Modern Chess Opening – 7 courses in the series;
Chess Tactics in Opening – 10 courses in the series;
Level 8. Rating: 2000 – 2200
CT-ART 4.0;Chess Guide for Intermediate Players;
Chess Strategy;
Middlegame Collections;
Encyclopedia of Middlegame I,II,III,IV,V;
Total Chess Ending;
Chess Endgame Training;
Theory and Practice of Chess Endings;
Modern Chess Opening – 7 courses in the series;
Chess Tactics in Opening – 10 courses in the series;
Level 9: Master Level (rating 2200-2400)
Middlegame Collections;Encyclopedia of Middlegame I,II,III,IV,V;
Total Chess Ending;
Chess Endgame Training;
Theory and Practice of Chess Endings;